Geolocation and store finder
Geolocation is a way of getting your visitor’s current location (with their permission, of course), and passing that information to your mobile page. Your mobile page can then figure out which business locations are the closest to where your visitor is at that point and time.
Our Geolocation feature allows you to enter multiple locations and display the closest locations to your visitor (with the option to see all locations).
You would start by creating Location Sets. A “Location Set” is simply a way of organizing your stores, by territory or function. For instance,
1. a business has a hundred stores, but only 20 of these stores offer a certain promotion. You can create a location set for these 20 stores only.
2. a business has stores in multiple states. You can create a location set for each state.
This is useful for navigation purposes, as you can link to a page that contains a Location Set. Typically you would put one Geolocation widget on a page, connect that widget to pull the stores/locations from a certain Location Set. Then you can link to that page from other pages on your site.
For instance, if a business has multiple locations in 2 countries (Germany and Spain), you can create 2 Location Sets (one for each country). Then on the home page of the site you can place two buttons (“See Germany Locations” and “See Spain Locations”), each linking to the pages listing stores from that country.
If the above organization does not make sense for your situation, you can put all your stores into one Location Set.
Note: keep in mind that the Geolocation feature may not be available for some visitors. Getting the visitor’s location requires that they give their permission (the page will ask them if they’d like to share their location, and they may respond with “no”). Also, some older devices don’t support this feature.
When Geolocation is not available, your visitors will still be able to see the list of all locations by clicking on “View all” link.
On these devices your visitors will still be able to pick a location by clicking on “View all”.
How to configure Geolocation:
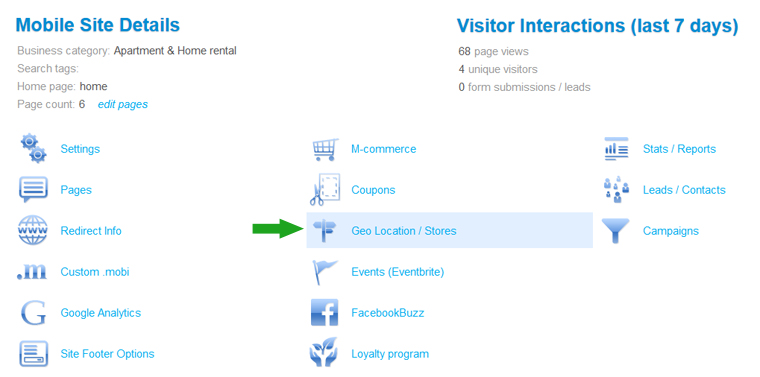
First, click the “Geo Location/Stores” link in your account dashboard:
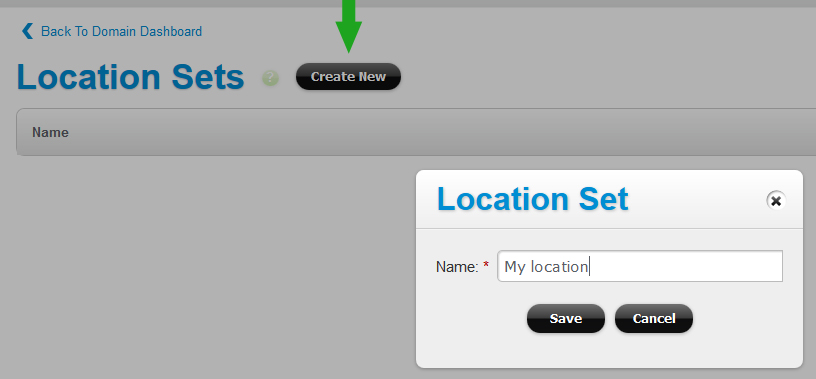
Then click on “Create new” to add a Location Set:
Then click on the “Locations” link and add location(s).

Enter the address, then click on Get Longitude and Latitude link (this calls our map server to look up the exact coordinates for the location). If our map server can’t find the address, or if the address is not correct (sometimes that happens with the new addresses, or for locations in places with poor map service coverage), then look up the coordinates for your location manually (you can use http://itouchmap.com/latlong.html or a similar service).
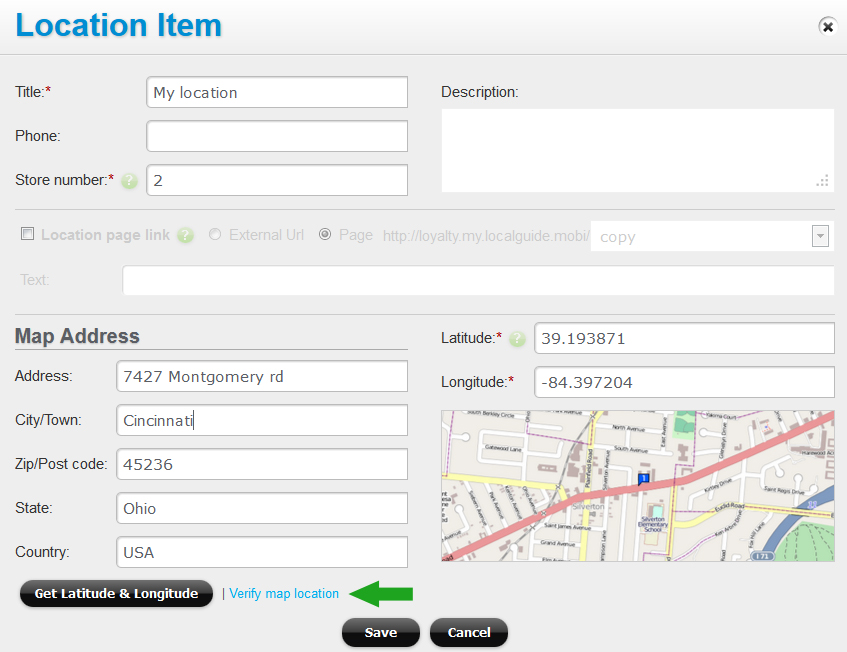
Enter the location’s phone number. If you have a separate page or site with the location’s details, you can add that in the “Location page link” section.
All that information will be displayed to your visitors when they see a list of your locations.
The store number is a required field. Geolocations in our platform are used for Coupon redemptions (when a coupon is redeemed, for security purposes the store number is verified). If you don’t have any particular numbers for the stores, then simply put some unique numbers (e.g. 1, 2, 3..)
★ Note: locations can also be uploaded from a spreadsheet or via the API.
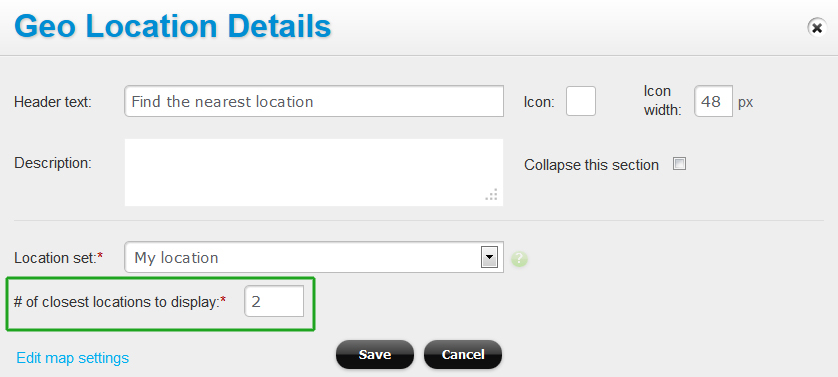
After you’ve added the locations, click on Pages, select the page on which you need to display the locations and open that page in the page editor, and add the “Geolocation” widget to the page. There you’ll specify which Location Set to pull the data from, and also how many closest locations to display to the visitor in detail:
Geolocation / Store Map
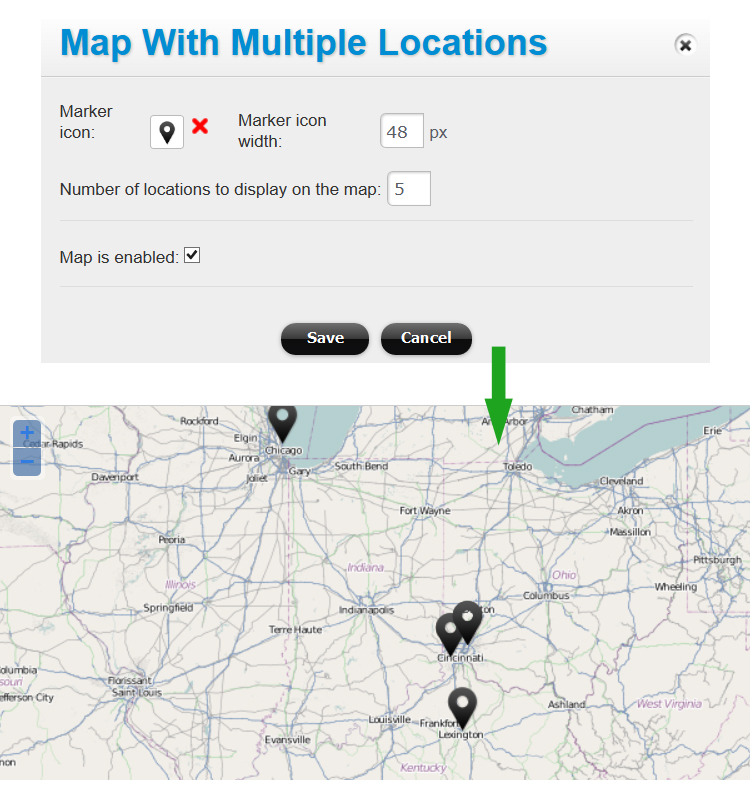
Optionally you can include a map displaying the locations. To display the map with the locations (as pins) at the top of the Geolocation widget, click on the “Edit map settings” link in the Edit screen for the Geolocation widget:
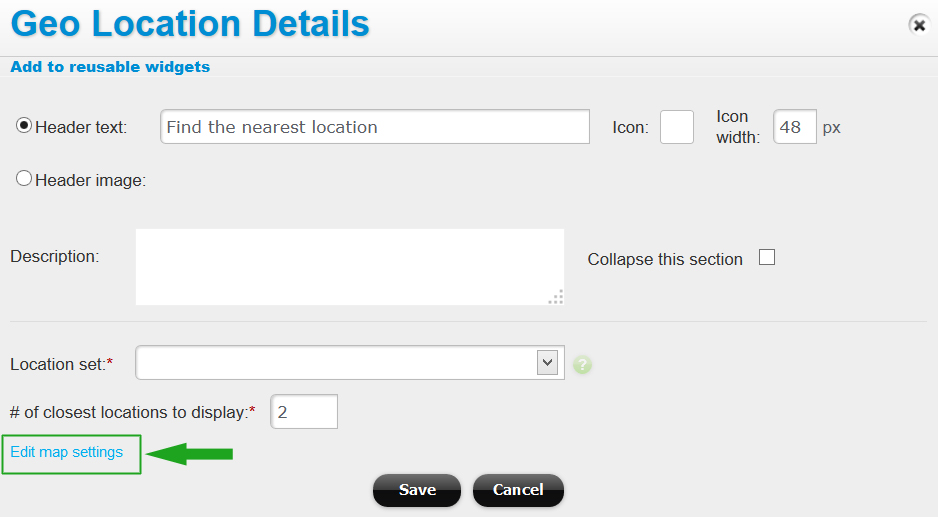
Here you can specify the marker (pin) icon, and how many locations to display on the map: